Upload a preview
How to use
Uploading your banners to a preview can be done in a number of ways.
The easiest method is to use our tool called “display-upload”, which you can start by running the following command:
npm run preview
If it’s the first time you run this command, you’ll see something like this:
Welcome to the Display.Monks Upload Tool v1.6.2
? No .uploadrc as added to the .gitignore, should i add it? (Y/n)
Press Y. You’ll see the following options
? Where do you want to upload? (Use arrow keys)
> Mediamonks Preview
  Adform
  Flashtalking
  Google DoubleClick Studio
  SFTP (alpha)
MediaMonks Preview
This will upload the entire build folder to a S3 bucket. When you select this, you’ll have to enter a few things:
? What directory you want to upload?
Just enter build here by default.
? Please fill in the name for the S3 Bucket:
? Please fill in the accessKeyId for the S3 Bucket:
? Please fill in the secretAccessKey for the S3 Bucket:
These values you can find in the pinned messages of our ‘wfh-aas-dev’ Slack channel.
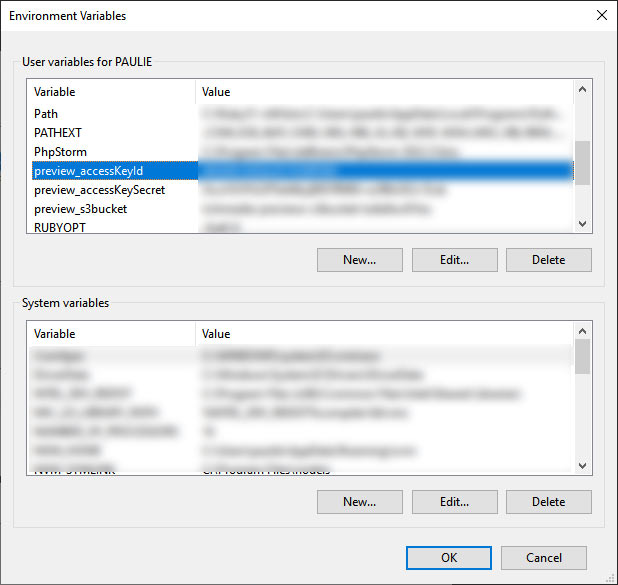
If you are a Windows user, you can also store these credentials in your Environment Variables. Add the variables preview_accessKeyId, preview_accessKeySecret and preview_s3bucket with the respective values to the user variables.
The tool will automatically generate a unique hash value as the directory name of the preview. Just press enter or add your own value and then press enter.
? outputDir: (3334d7e2-3d58-4c84-aec7-4b6d4f50c7f0/)
Keep in mind that this unique hash has been created in order always create a unique url, to change this to a common url like test/ or client/ is therefore a bad practise. Better use the hash in combination with your own project, like 3334d7e2-3d58-4c84-aec7-4b6d4f50c7f0/client/project/ads/v1/
It will then upload the contents of the ./build/ directory and show you a link to the preview, which should look something like this:
http://richmedia-previews-s3bucket-khpmpnjb2dya.s3.amazonaws.com/3334d7e2-3d58-4c84-aec7-4b6d4f50c7f0/index.html
Preview parameters
These parameters might be useful if you want to create multiple previews, for each different version of an ad for example. There is a parameter outputDir available that you can run along with the build command.
Property | Description |
|---|---|
| --type | type of preview, possible values mm-preview, adform, flashtalking, doubleclick, sftp |
| --inputDir | Relative input directory, shorthand is -i. By default ./build, but you can change it to for example ./build/version1/ |
| --outputDir | Relative online url output directory, shorthand is -o. by default a unique hash/, but you can change it to for example 3334d7e2-3d58-4c84-aec7-4b6d4f50c7f0/version1/ to make sub pages inside your hash |
Examples
Via the Commandline
Use the preview command
npm run preview -- --type mm-preview --inputDir ./build/version1/ --outputDir 1f08c1d9-b4f1-4a47-831b-409cf070b151/version1/
or the shorthand version:
npm run preview -- -t mm-preview -i ./build/version1/ -o 1f08c1d9-b4f1-4a47-831b-409cf070b151/version1/
In your package.json
Use the dds command
"preview:version1": "display-upload -t mm-preview -i ./build/version1/ -o 1f08c1d9-b4f1-4a47-831b-409cf070b151/version1/
Advanced combinations
Example with a glob for automizing purposes:
"build-preview:version1": "dds --mode production -o ./build/version1/ --choices eyJsb2NhdGlvbiI6WyJhbGwiXSwiZW1wdHlCdWlsZERpciI6dHJ1ZX0= && display-upload -t mm-preview -i ./build/version1 -o 1f08c1d9-b4f1-4a47-831b-409cf070b151/version1/"
Or use combinations of the different scripts, here in doall:v1, build:v1 and upload:v1 are combined to one new script
"build:v1": "dds --mode production -o build/v1",
"upload:v1": "display-upload -t mm-preview -i build/v1 -o 12528e62-6871-47de-abd1-6144e476bc73/v1/",
"doall:v1": "npm run build:v1 && npm run upload:v1",